Little Red Barn Playhouse
Then I illustrated an adorable book for Sleeping Bear Press called Little Red Rolls Away about a little barn who reluctantly has to move to a new home. Ta da! I had a great excuse to make a kid's playhouse (or play barn)! Right?
This was a lot of fun to make. I'll give you the basics of how I did it here. If anyone is interested in more detail instructions email me or leave a comment.
I based my design off plans I found on https://formufit.com/pages/pvc-kids-playhouse-small
You can also buy the PVC elbows and other fittings you will need from your local hardware store or from https://formufit.com. My local Home Depot didn't carry all the special elbow joints I needed so I had to order some of them.
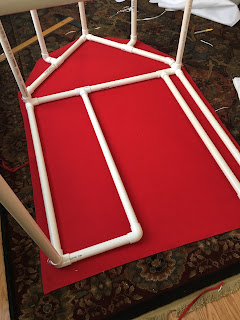
I altered the Formufit design a little by adding more structure around the doorway and also adding 2 small bump outs to the roof line so it looks more like a barn. You can see the front panel of the barn with the door and bump outs here...
If this was for home use you could just glue or screw all the joints together. But I wanted to be able to travel to book events with my play barn so I wanted a way to make it break down easily but also make it so it wouldn't fall apart if a kid was playing inside.
The front and the back panels of the frame are permanently assembled with screws. The pipes that make up the left and right sides are removable. That way the whole thing lays flat in the back of my Subaru. I struggled with a way to make sure the pipes didn't fall apart while the kids where playing. The pipes fit snuggly together but I was afraid one might pull loose and someone might get bonked on the head.
I tried a couple of different ideas, but these hitch pins work pretty well. I found them at my local hardware store. They look like this. I also found some online but they were listed under several names - hitch pins, safety pins, spring clips etc. They come in lots of sizes so double check before ordering. Some of the ones I ordered were a too long so I cut them down to size with a hack saw.
Hitch Pin connectors
Once the frame was done it was time for the fun part. I made the cover out of craft felt. You can by 60" wide yardage at JoAnn's. It's easy to work with, comes in lots of colors and is fairly economical especially if you have a coupon. Be careful when ironing though, I got it too hot and melted the red to my iron. (Luckily it all came off!)
To make the cover, I laid the framework down and traced it, making sure to leave room for seam allowances.
I added details like windows and flower boxes...
And of course the face so it looked like Little Red from the book. I glued some Velcro (the prickly side) to the PVC around door way to keep the felt in position. I sewed the fuzzy side of the Velcro to the felt but actually the felt sticks to the prickly side of the velcro already.
Of course we needed someone to live in the barn so I made a couple of these cute pool noodle ponies with the scrap felt and some yarn. Meet Fettuccini!
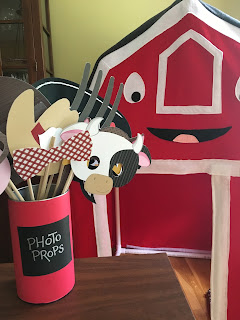
For store events I have photo props so people can snap a pic with Little Red.
This was a lot of work but it was also a lot of fun the kids really seem to enjoy it. Cheers!


Comments