Photoshop - Using Photos to Create Texture Brushes
I like creating my own texture brushes from all sorts of things. This tutorial will show you how to create texture brushes from your own photos.
Texture hunting makes for a fun afternoon. If you have little kids, it can be a fun family project. With digital camera in hand, and start looking for interesting patterns and textures. Rocks, trees, carpets, clouds are just a few things that can make neat texture brushes.
Once you have a some photos,upload them and open in Photoshop. This is a photo I took on vacation of a rock outcropping in Central Park...
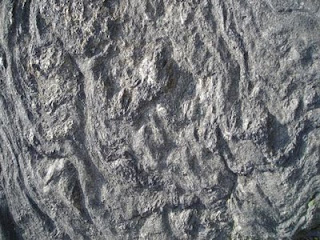
This photo was already fairly monochromatic but that's not always the case, so the first thing I like to do is desaturate the image (Images->Adjustments->Desaturate). Then I create a levels adjustment layer. I want to boost the contrast in my image to make the texture more noticeable in the final brush.
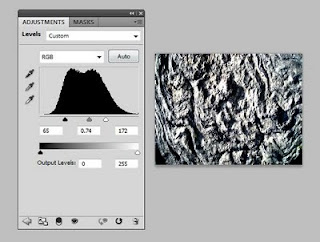
Altering the levels isn't mandatory, you can leave more gray tones in your image, it will just mean that the textures will be more subtle. Experiment and see what works for you.
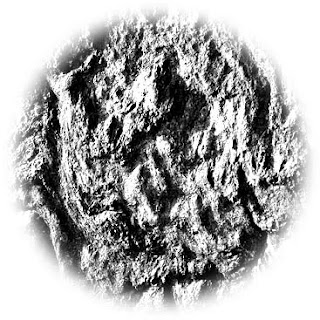
Next I use the round marquee tool to select a circle out of the middle of my photo. I then click Select->Modify->Feather and feather the edges of my selection about 10 or 15 pixels.
I then copy and paste my selection to a new file. So I have something like this...
Now I can create a new brush by clicking Edit->Define Brush Preset. This is what it looks like when I try and paint with it.
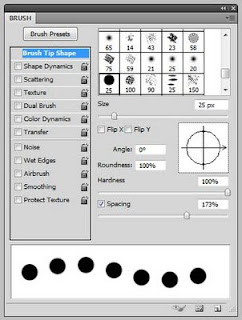
It's okay but I think modifying the brushes characteristics will make it a lot better. So I open the Brushes Palette and make a few modifications. First I increase the spacing. Right now some of the texture is getting lost in the overlay of the individual brush strokes. By increasing the spacing a little the texture will show through better.
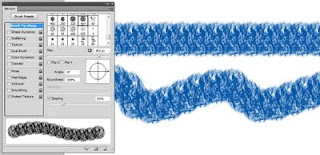
Next, I find it bothersome that the pattern repeats so regularly, it gives it a mechanical feel. So, within the brush palette, I select "Shape Dynamics" I set the Angle jitter to 100% and checked the Flip X Jitter and Flip Y Jitter check boxes. This way the brush is getting flipped and rotated every time the brush tip is laid down. This makes it much more random and natural looking.
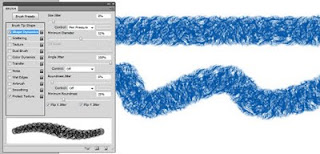
The last modification I'm going to do to this brush is to select Transfer and set the Flow Jitter Control to "Pen Pressure" so if I press lightly I get a lighter application of color. Once I did all that, I made sure I saved my new brush. If I didn't save it, then all my tweaks would have been lost the next time I went to use this brush.
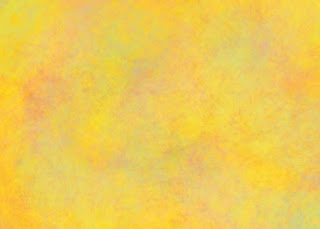
Now lets try out this new brush. I selected my new "rock brush" and set the opacity to 60%. I then filled a page with overlapping scribbles of different colors. And I have to admit, I like the outcome. I thought I was making a very sharp texture but it turns out that it's capable of making a nice smokey sort of a texture.
Here are a couple of other brushes that I created from photos. This one is a photo of a ceramic bowl with a crackled finish from my kitchen cabinet.

I guess I shouldn't have put that one in the dishwasher. But oh well, it makes a interesting Photoshop brush...
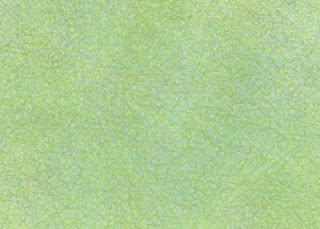
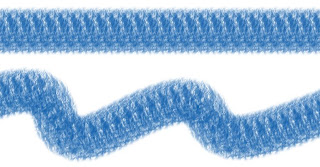
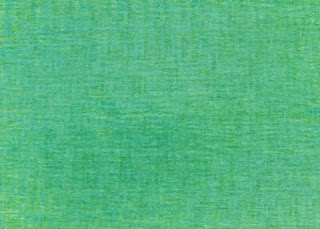
And here's one that is made from an image of a circuit board.
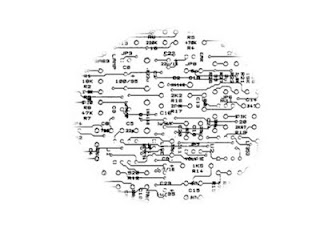
This one, surprisingly, makes a nice texture that looks almost like fabric.
So again, I encourage you to create you own texture brushes. Here's an idea, the next time you're on vacation or visiting a special location, take some photos to transform into textures. It will make your art even more personal and special.
Texture hunting makes for a fun afternoon. If you have little kids, it can be a fun family project. With digital camera in hand, and start looking for interesting patterns and textures. Rocks, trees, carpets, clouds are just a few things that can make neat texture brushes.
Once you have a some photos,upload them and open in Photoshop. This is a photo I took on vacation of a rock outcropping in Central Park...

This photo was already fairly monochromatic but that's not always the case, so the first thing I like to do is desaturate the image (Images->Adjustments->Desaturate). Then I create a levels adjustment layer. I want to boost the contrast in my image to make the texture more noticeable in the final brush.

Altering the levels isn't mandatory, you can leave more gray tones in your image, it will just mean that the textures will be more subtle. Experiment and see what works for you.
Next I use the round marquee tool to select a circle out of the middle of my photo. I then click Select->Modify->Feather and feather the edges of my selection about 10 or 15 pixels.
I then copy and paste my selection to a new file. So I have something like this...

Now I can create a new brush by clicking Edit->Define Brush Preset. This is what it looks like when I try and paint with it.

It's okay but I think modifying the brushes characteristics will make it a lot better. So I open the Brushes Palette and make a few modifications. First I increase the spacing. Right now some of the texture is getting lost in the overlay of the individual brush strokes. By increasing the spacing a little the texture will show through better.

Next, I find it bothersome that the pattern repeats so regularly, it gives it a mechanical feel. So, within the brush palette, I select "Shape Dynamics" I set the Angle jitter to 100% and checked the Flip X Jitter and Flip Y Jitter check boxes. This way the brush is getting flipped and rotated every time the brush tip is laid down. This makes it much more random and natural looking.

The last modification I'm going to do to this brush is to select Transfer and set the Flow Jitter Control to "Pen Pressure" so if I press lightly I get a lighter application of color. Once I did all that, I made sure I saved my new brush. If I didn't save it, then all my tweaks would have been lost the next time I went to use this brush.
Now lets try out this new brush. I selected my new "rock brush" and set the opacity to 60%. I then filled a page with overlapping scribbles of different colors. And I have to admit, I like the outcome. I thought I was making a very sharp texture but it turns out that it's capable of making a nice smokey sort of a texture.

Here are a couple of other brushes that I created from photos. This one is a photo of a ceramic bowl with a crackled finish from my kitchen cabinet.

I guess I shouldn't have put that one in the dishwasher. But oh well, it makes a interesting Photoshop brush...

And here's one that is made from an image of a circuit board.

This one, surprisingly, makes a nice texture that looks almost like fabric.

So again, I encourage you to create you own texture brushes. Here's an idea, the next time you're on vacation or visiting a special location, take some photos to transform into textures. It will make your art even more personal and special.

Comments