Quickly Creating Patterns in Photoshop
As I was unpacking my materials from the NESCBWI conference this week I realized that I completely forgot to cover one of my presentation topics. I'm so annoyed with myself, because I thought it was one of the neater things that I was going to cover. I can't believe I forgot it. Oh well, at least I'll post it here on my blog. Better late than never, right?
I discussed this technique a while ago in the context of creating polka dot patterns but I think it's worth repeating. Many folks like to create collage images but are concerned about the copyright implications of using other people's fabric or paper designs in their work. This is a quick way to create all sorts of repeating pattern of your own in Photoshop.
First create a new document in Photoshop. It doesn't matter what size you make it as long as the height and width are an even number of pixels. I'm going to make mine 200px wide and 200px tall. Make note of the size, you will need it later.
Next draw something. The only rule is that you can not touch the document boundaries with your drawing. You can change the background to different solid color if you want, but make sure your drawing does not touch the edges of your image.
You can add textures, shadows, what ever, get as fancy with this as you want. Here I set the background to a light blue and drew a flower.

Now I could stop right here. If I click "Select -> All" and "Edit -> Define Pattern" I will get a pattern that will look something like this...
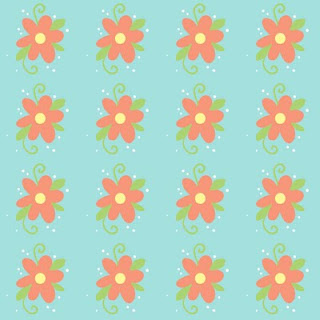
It's not bad but I want something less grid-like. So I'm going to modify it. First if you used more than one layer to create your image (which I did) you will need to flatten it into one layer. Next, select "Filter -> Other -> Offset" You will need to set the horizontal offset to one half of the total width of your image. In my case that would be 100 pixels. You will also set the vertical offset to half of the total height, again, in my case, that will be 100 pixels. Lastly, you will check "Wrap Around" for the undefined areas. If you click on the other options you will quickly see the difference. Once I run the offset filter I have something like this...

Now I can again draw something in the middle. But again don't touch the edges of the document. I can even draw over my original drawing and modify it just as long as I stay away from the document bounds. I drew another flower and one of the green curly cues overlap my original flower.

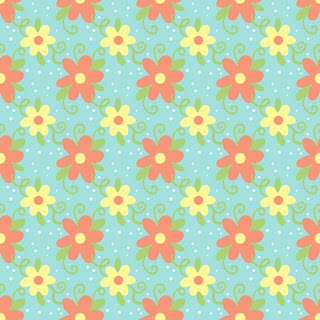
Now if I click "Select -> All" and "Edit -> Define Pattern" I get a more fluid looking pattern like this...
As you can imagine, making new patterns is rather addictive and before you know it, you will have a whole library of your own patterns to choose from.

ADDENDUM: I didn't make it very clear what to do after you click Edit -> Define Pattern. So here goes...
After I hit Edit -> Define Pattern. I like to save the original pattern file. So for my flower pattern I would save it as "flowerpattern.psd" I like to save all my patterns to a directory I called "PatternFiles" that way if I ever need to change one I have the original file to work with.
Once I save it, I can close the original file I won't need it anymore. Now I can create a new file. Make this new file larger than the first pattern file. For example, my flower pattern was 200px X 200px So I made a new file that's 800x1125 (it doesn't matter how big it is - just as long as it's bigger than the pattern file so you can see your pattern repeating) In this new file I make a selection. I wanted my pattern to fill the whole file so I clicked Select -> All then I clicked Edit -> Fill and when the dialog box comes up, I selected "Pattern" for the "Contents Use" dialog. And down below where it says custom pattern I click the little arrow next to the pattern and my new pattern should show up in the list. I select it, and when I click okay my new file should be filled with the flower pattern.
Hope this clears up any confusion.
I discussed this technique a while ago in the context of creating polka dot patterns but I think it's worth repeating. Many folks like to create collage images but are concerned about the copyright implications of using other people's fabric or paper designs in their work. This is a quick way to create all sorts of repeating pattern of your own in Photoshop.
First create a new document in Photoshop. It doesn't matter what size you make it as long as the height and width are an even number of pixels. I'm going to make mine 200px wide and 200px tall. Make note of the size, you will need it later.
Next draw something. The only rule is that you can not touch the document boundaries with your drawing. You can change the background to different solid color if you want, but make sure your drawing does not touch the edges of your image.
You can add textures, shadows, what ever, get as fancy with this as you want. Here I set the background to a light blue and drew a flower.

Now I could stop right here. If I click "Select -> All" and "Edit -> Define Pattern" I will get a pattern that will look something like this...

It's not bad but I want something less grid-like. So I'm going to modify it. First if you used more than one layer to create your image (which I did) you will need to flatten it into one layer. Next, select "Filter -> Other -> Offset" You will need to set the horizontal offset to one half of the total width of your image. In my case that would be 100 pixels. You will also set the vertical offset to half of the total height, again, in my case, that will be 100 pixels. Lastly, you will check "Wrap Around" for the undefined areas. If you click on the other options you will quickly see the difference. Once I run the offset filter I have something like this...

Now I can again draw something in the middle. But again don't touch the edges of the document. I can even draw over my original drawing and modify it just as long as I stay away from the document bounds. I drew another flower and one of the green curly cues overlap my original flower.

Now if I click "Select -> All" and "Edit -> Define Pattern" I get a more fluid looking pattern like this...

As you can imagine, making new patterns is rather addictive and before you know it, you will have a whole library of your own patterns to choose from.


ADDENDUM: I didn't make it very clear what to do after you click Edit -> Define Pattern. So here goes...
After I hit Edit -> Define Pattern. I like to save the original pattern file. So for my flower pattern I would save it as "flowerpattern.psd" I like to save all my patterns to a directory I called "PatternFiles" that way if I ever need to change one I have the original file to work with.
Once I save it, I can close the original file I won't need it anymore. Now I can create a new file. Make this new file larger than the first pattern file. For example, my flower pattern was 200px X 200px So I made a new file that's 800x1125 (it doesn't matter how big it is - just as long as it's bigger than the pattern file so you can see your pattern repeating) In this new file I make a selection. I wanted my pattern to fill the whole file so I clicked Select -> All then I clicked Edit -> Fill and when the dialog box comes up, I selected "Pattern" for the "Contents Use" dialog. And down below where it says custom pattern I click the little arrow next to the pattern and my new pattern should show up in the list. I select it, and when I click okay my new file should be filled with the flower pattern.
Hope this clears up any confusion.

Comments
Great meeting you at NESCBWI too.
sydney loves your patterns and I am trying to walk her through her own but I got stuck. What do I do after I have selected "define Pattern"? It gives a place to name it but then I don't actually know how to increase the size of the document and repeat it.