Photoshop Tutorial - Watercolors (sort of)
When it comes to digital art, there is a school of thought that feels that the more digital artwork mimics traditional mediums the better. Unfortunately, anyone who has tried to replicate watercolors knows that a computer tends to fall short when it comes to copying those "happy accidents" that are inherent in watercolor painting. So I say, why try? Instead of slavishly trying to replicate watercolors, this technique takes inspiration from a loose airy style of watercolor painting and incorporates it into something new and a little different.
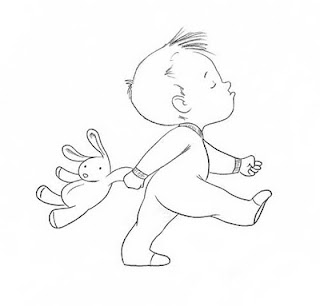
This illustration started off by scanning in a finished pencil drawing. I sometimes do my final line work in Photoshop using various grainy brushes, but sometimes it just feels good to pick up a pencil and paper.
After I scanned in the drawing, I selected Image/Adjustments/Desaturate to convert the image to black and white. The paper I was using had a slight yellow cast to it and I didn't want that showing up in the final art. Next, I selected Image/Adjustments/Levels. I clicked on the white eyedropper and then clicked on the white of the paper to make paper really white. Next I selected the middle slider under the Input Levels graph and slid it slightly to the right to darken the pencil lines just a bit.
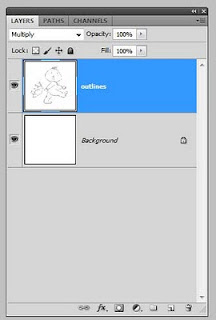
Once the pencil drawing was adjusted and looking right, I moved it to a layer above the background layer. The way I do that is to open the Layers windows and click and drag the background layer down to the "new layer" icon at the bottom of the layer window, it's the icon next to the trash can. This creates a duplicate of the background. Name this new layer, "outlines." Set the blend mode of this new "outlines" Layer to "Multiply" Next I select the background layer and click Select/All and fill the whole background with white. So now my image looks like this...
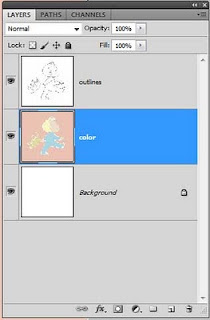
And my Layers window looks something like this...
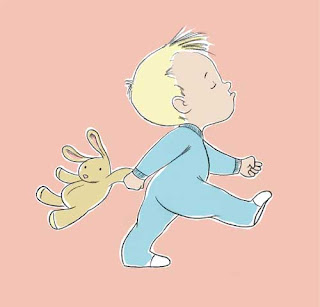
Next I create a new layer between the background layer and the outlines layer and name this new layer "colors".
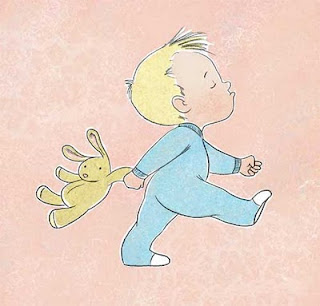
On the new "colors" layer I select the paintbrush tool and using a hard round brush and 100% opacity I start coloring in the picture. I purposely leave gaps here and there to leave bits of white showing between the colors just as if I was painting wet watercolors next to each other. If you aren't seeing the colors, make sure you have the outlines layer blend mode set to "multiply."
So now the image looks like this...
And the Layers window should look like this...
Now make a duplicate of the "color" layer. Lock the original color layer so you don't inadvertently mess it up, you may need to go back to it later. On the new "color copy" layer use the magic wand tool to select a flat blue area of color on his PJ's. Using various texture brushes and different shades of blue I added some variation to color. I also like to sneak in bit of different colors here and there. For more info on creating textures see my texture tutorial. Continue to add textures to all of the areas of the image. With all of the image textured, I have this...
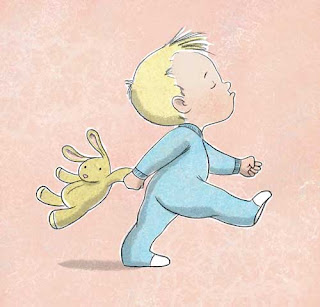
The last step is to add some shadows to give everything a little dimension. I do that on a new layer called, you guessed it, "shadows". I set the opacity of this new layer to 20% and then using black and a grainy chalk-like brush I add some shadows.

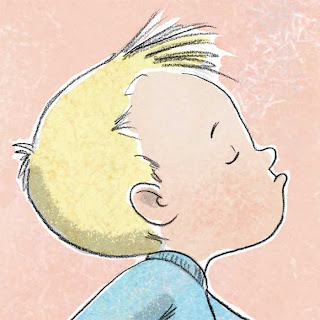
Here you can see a closeup of the final art. As you can see, no one would ever confuse this with watercolors but hopefully it still has the same airy whimiscal quality.

This illustration started off by scanning in a finished pencil drawing. I sometimes do my final line work in Photoshop using various grainy brushes, but sometimes it just feels good to pick up a pencil and paper.
After I scanned in the drawing, I selected Image/Adjustments/Desaturate to convert the image to black and white. The paper I was using had a slight yellow cast to it and I didn't want that showing up in the final art. Next, I selected Image/Adjustments/Levels. I clicked on the white eyedropper and then clicked on the white of the paper to make paper really white. Next I selected the middle slider under the Input Levels graph and slid it slightly to the right to darken the pencil lines just a bit.
Once the pencil drawing was adjusted and looking right, I moved it to a layer above the background layer. The way I do that is to open the Layers windows and click and drag the background layer down to the "new layer" icon at the bottom of the layer window, it's the icon next to the trash can. This creates a duplicate of the background. Name this new layer, "outlines." Set the blend mode of this new "outlines" Layer to "Multiply" Next I select the background layer and click Select/All and fill the whole background with white. So now my image looks like this...

And my Layers window looks something like this...

Next I create a new layer between the background layer and the outlines layer and name this new layer "colors".
On the new "colors" layer I select the paintbrush tool and using a hard round brush and 100% opacity I start coloring in the picture. I purposely leave gaps here and there to leave bits of white showing between the colors just as if I was painting wet watercolors next to each other. If you aren't seeing the colors, make sure you have the outlines layer blend mode set to "multiply."
So now the image looks like this...

And the Layers window should look like this...

Now make a duplicate of the "color" layer. Lock the original color layer so you don't inadvertently mess it up, you may need to go back to it later. On the new "color copy" layer use the magic wand tool to select a flat blue area of color on his PJ's. Using various texture brushes and different shades of blue I added some variation to color. I also like to sneak in bit of different colors here and there. For more info on creating textures see my texture tutorial. Continue to add textures to all of the areas of the image. With all of the image textured, I have this...

The last step is to add some shadows to give everything a little dimension. I do that on a new layer called, you guessed it, "shadows". I set the opacity of this new layer to 20% and then using black and a grainy chalk-like brush I add some shadows.

Here you can see a closeup of the final art. As you can see, no one would ever confuse this with watercolors but hopefully it still has the same airy whimiscal quality.


Comments